Friday Flash - Episode 6

IMG_5110.jpg

Happy weekend! My husband's birthday and my birthday are about two weeks apart, so I wanted to create a soft-but-sexy, punched-up natural look for our birthday dinners out.

YouTube

What I used:

On face: custom foundation/contour/highlight

Lips: NYX Cosmetics Lip and Eyebrow pencil in Taupe and Chelsea Girls Lip Lacquer (discontinued, sorry!)

On eyes: For my base I started with Urban Decay Foxy.  Next, I put Galapagos by Nars in the crease using a MAC 217 brush, then I blended out that color with the Mac 224 brush using Malt, also by MAC.  I smudged Costa Riche eye pencil by MAC into my top lash line, then used MAC pigment in Gold Mode to brighten up my lid. Finally I curled my lashes and used one coat of Maybelline Falsies mascara in blackest black, then applied three trio lash clusters by Kiss INV on the part of my lash line directly under the arch of my brow.

Technique Class - The Crease

IMG_5274.jpg

One thing that remained the same over my 17 years as a dancer was technique class.  No matter your level of proficiency, no one was ever above starting the day/rehearsal with a class in the basics. As a makeup artist, I've had the pleasure of working with a vast array of clients.  Still, despite differences in skin color or age or skin type, I am consistently asked about the same three or four concerns.

So, I decided to combine these two topics into a series that will run through the end of next month to show you how I approach certain makeup situations.

Today, we'll start with the crease of the eye.

First and foremost - it is very important to manage expectations here.  Every eye shape is different and there are a so many great blogs and YouTube videos on the subject if you want in-depth info.  For now, we'll focus more on basic anatomy.

You want to get to know your eye, so figure out where the lid is:

IMG_5273

Your lid, in terms of makeup, is the skin that just covers our eyeball.

Where the lid breaks when you eye is open is considered your crease:

IMG_5274

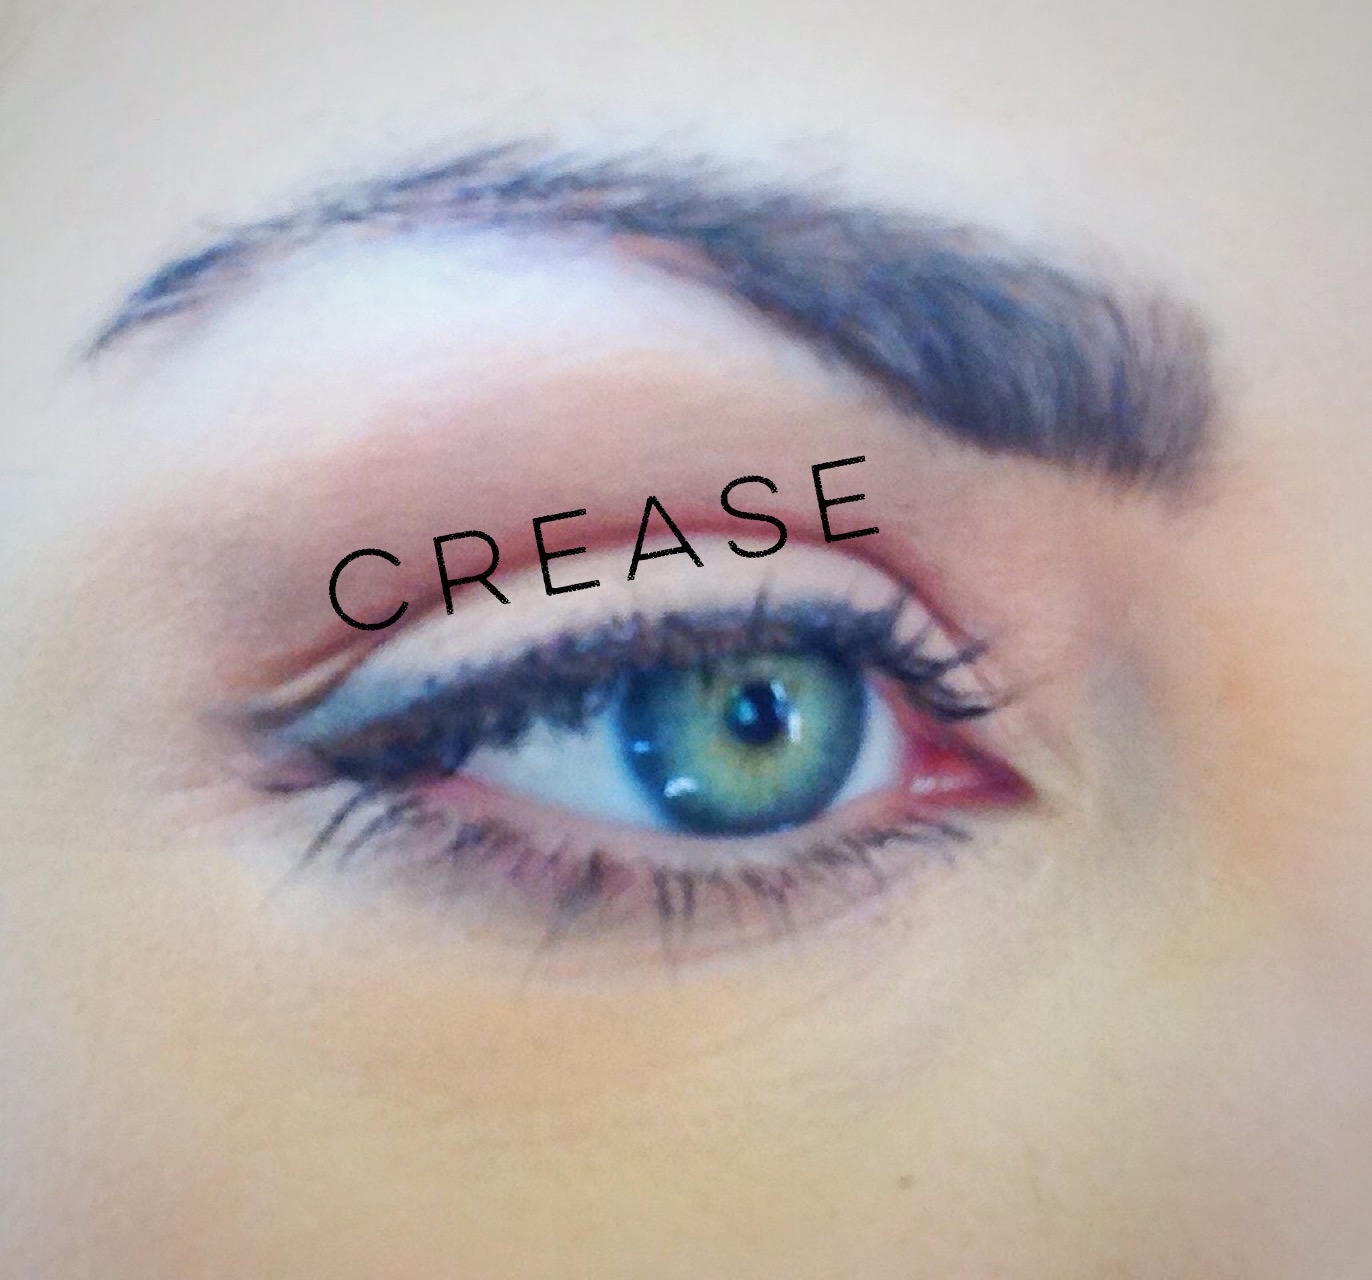
Not everyone has a crease, but that's fine!  You don't need one.  If you have a monolid, you can create one if you want to, and if you have a hooded lid, you'll just have to join the ranks of Giselle, Blake Lively, and Jennifer Lawrence (oh, darn) and focus on the lash lines.

Next, find your brow bone, or orbital bone:

IMG_5270

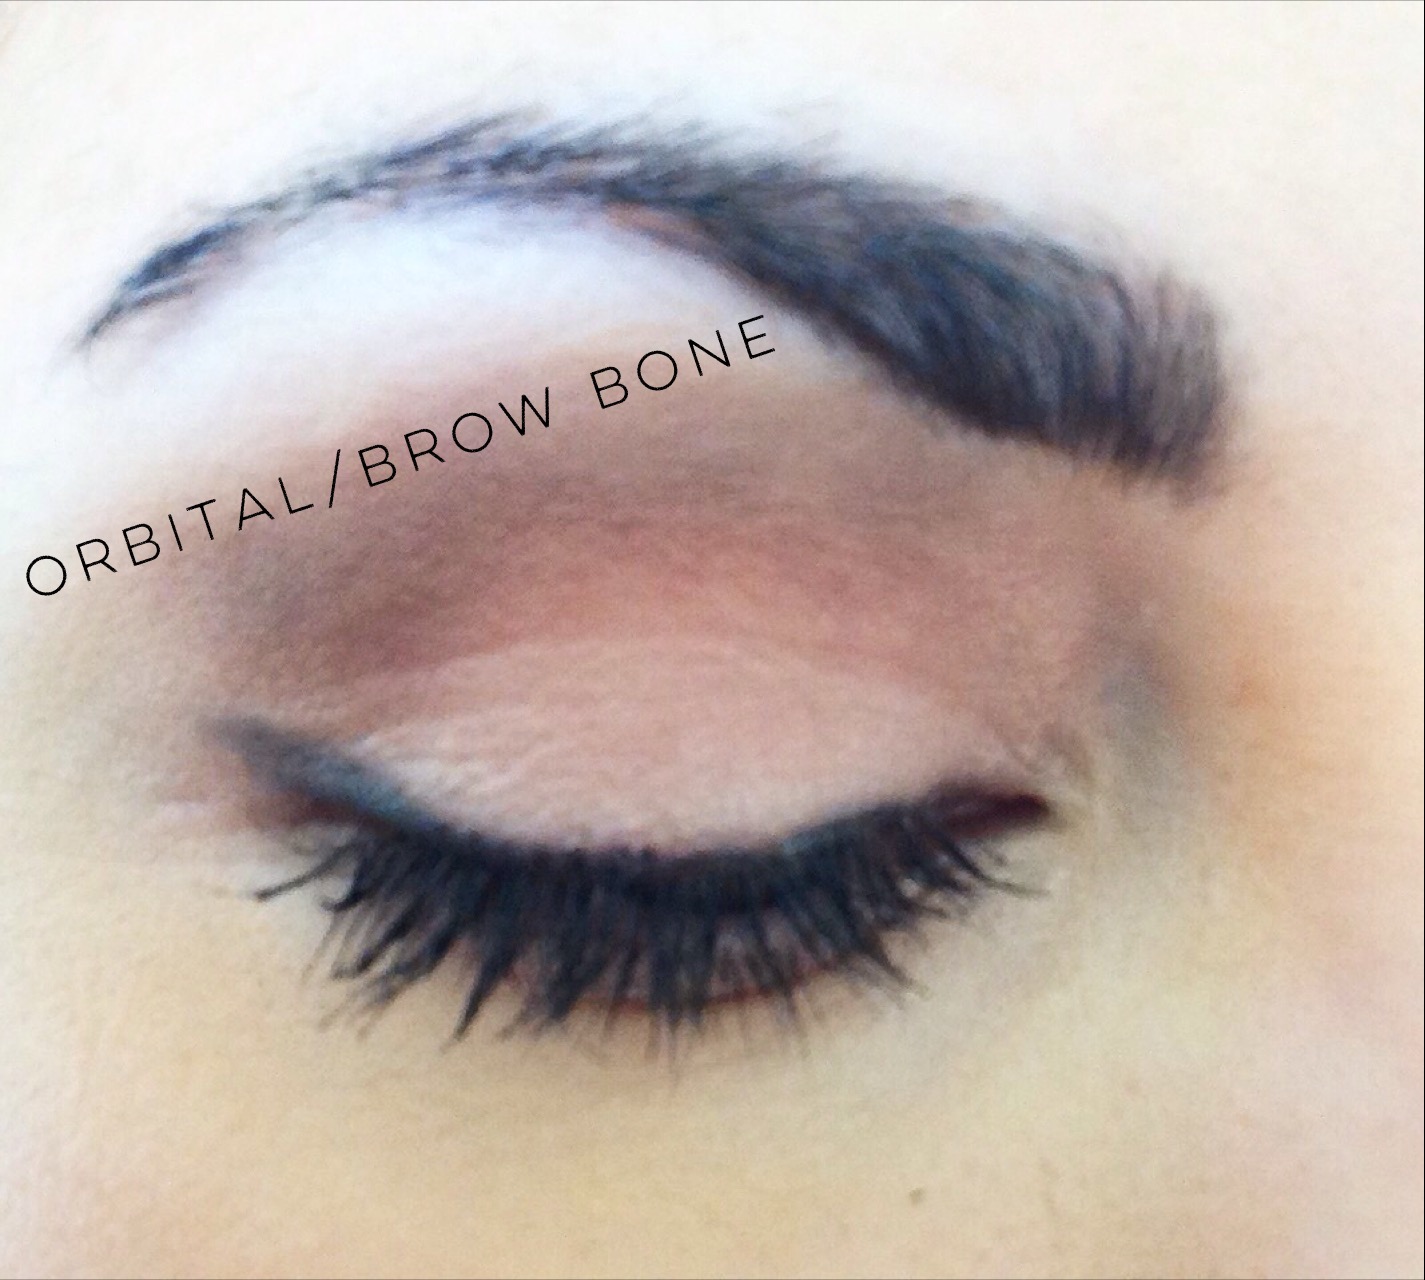
It's the bone that sticks out near your eye brow.

Everything between those two points can be considered the crease area:

IMG_5271

If you do have a crease, your crease area will vary.  I have a really large one - and if I fill it in with too much dark shadow, my eyes look closed; too little, my brows look too high.  Some folks who have deep-set eyes only have a very thin area.  It's all good!

We fill in our crease to make our eyes look larger because, as I show here,  darker colors make things recede and lighter colors bring things forward; if that crease area recedes, the eye lid comes forward - making it appear larger.

When filling in the crease, start in the outer corner and sweep inward with a slim brush like the MAC 217, then blend the edges with a brush like the MAC 224.

Now that you know where your crease is, have fun creating new looks - and upload a photo to Instagram/Twitter with the hashtag #byoma so I can check them out!

Travel Hacks - Part II

IMG_5076.jpg

A few weeks ago, I shared some of my beauty packing tips.  Since we were extra tight on space, I picked up a few tricks along the way, so here's a follow up to my previous list.

Pack a collapsible tote

image1

With my skincare and makeup split into two separate bags thanks to airport security standards, it was a bit cumbersome to carry everything to the bathroom we shared with our suite mates.  In the future, I'll keep my Baggu tote handy so I can toss everything in there upon arrival.

Utilize a bag-within-a-bag

IMG_4793

When traveling carry-on only, I'll keep a smaller in-flight ready bag inside my clear, TSA-approved liquids bag to slip into the seat pocket in front of me.  The hydrating serum, hand sanitizer, and under-eye masks, all within reach instead of in the overhead compartment, went a long way in keeping me fresh upon arrival.

Do the best you can with what you have

FullSizeRender

...because it's not about the makeup, it's about the experience!  I applied my makeup en route on a very bumpy road.  My best work? Nope.  But I really don't remember the look because I had such an amazing time on our trip.


Friday Flash - Episode 5

IMG_5011.jpg

It seems like EVERYONE wants to know how to do a brown smokey eye. You're welcome.

Just kidding (kind of).  But really - if you can finger paint, you can do this.  Smudge a brown eye liner on your lash line, then dust on a lighter brown shadow over the liner, from lash line to brow bone.  Finally, take a pale shadow and, starting under your eye brow, blend that color down into the brown shadow (products are listed below the video).

You got this.  Happy weekend!

YouTube

  1. Make Up For Ever Radiant Primer
  2. Jouer Luminizing Moisture Tint in Golden
  3. NARS Matte Multiple in Anguilla
  4. La Mer Translucent Powder
  5. MAC eye liner in Costa Riche
  6. Make Up For Ever Mat Bronze in 40 (as eye shadow)
  7. MAC eye shadow in Shroom
  8. Black eye shadow pressed into lash line
  9. Amazing Cosmetics Amazing Concealer in Light Golden
  10. Fill in brows with MAC Brun eye shadow and set with clear brow gel
  11. Curl lashes and apply one coat of Estee Lauder's Little Black Primer and one coat of volumizing mascara
  12. NARS Laguna Bronzer
  13. Make Up For Ever Lift Concealer in 3
  14. MAC Omega eye shadow for nose contour
  15. Urban Decay All Nigher setting spray
  16. Hourglass nude crayon in 3


Lashes for Days

IMG_5087.jpg

It's never too early for me to start planning for my favorite holiday, Christmas. In fact, I keep a rolling gift list for family and friends all year long. I've had presents hidden around my house since July. You get the picture. In the same way, I don't think it's too early to start prepping makeup looks for those holiday parties (yay!). In an already busy season, it can seem like a chore to get ready for yet another get-together; but fear not! The quickest and easiest way to punch up your look is with a set of false eyelashes.  Best of all?  These can be purchased at your local drugstore or Amazon.com.

Here are my top three picks:

The Strip

IMG_5084

When you want your eyes to pop while still looking natural, the Ardell 110 strip lashes are my go-to.  I wore them on my wedding day, and I still keep them in stock for any occasion.

Fancy

IMG_5085

When I want a little something extra, I love the Demi Wispies, also by Ardell.  These offer a full fringe that doesn't veer into scary land, and I really enjoy how large my eyes look when wearing them.

Individuals

IMG_5086

The Kiss iEnvy Trio Lashes are uh-ma-zing because they let you completely customize your look, they're easy to layer on a strip of lashes for more drama, and they're much easier to apply than the single individuals.

Monica Blunder, an incredible celebrity makeup artist, has a fantastic video on lashes - you can check it out by clicking HERE.