Friday Flash - Episode 2

FullSizeRender1.jpg

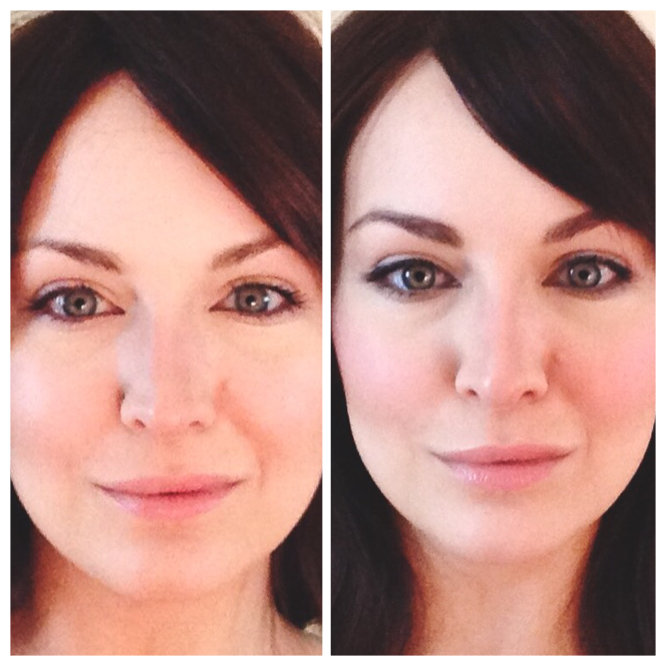
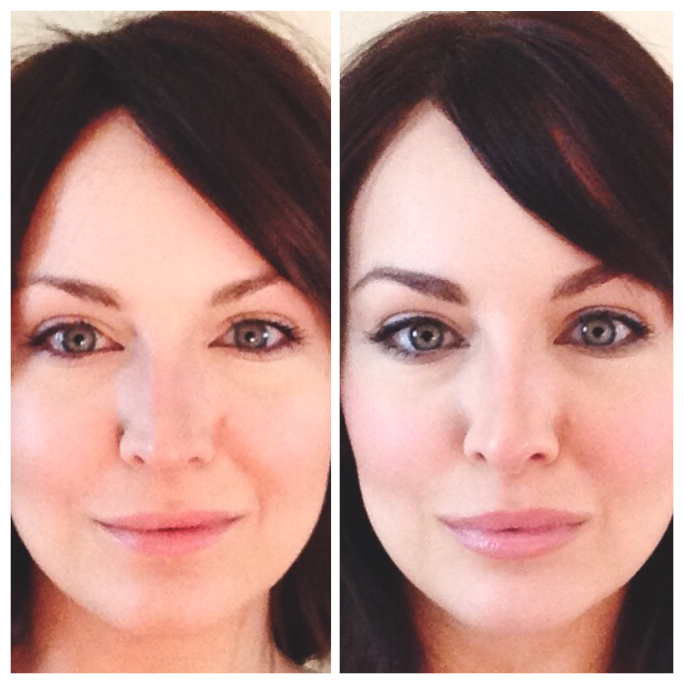
For our second Friday Flash, I went with a really dark, strong smokey eye and pale/nude lip.  Check out the video below, and the product list below that.  Happy weekend!

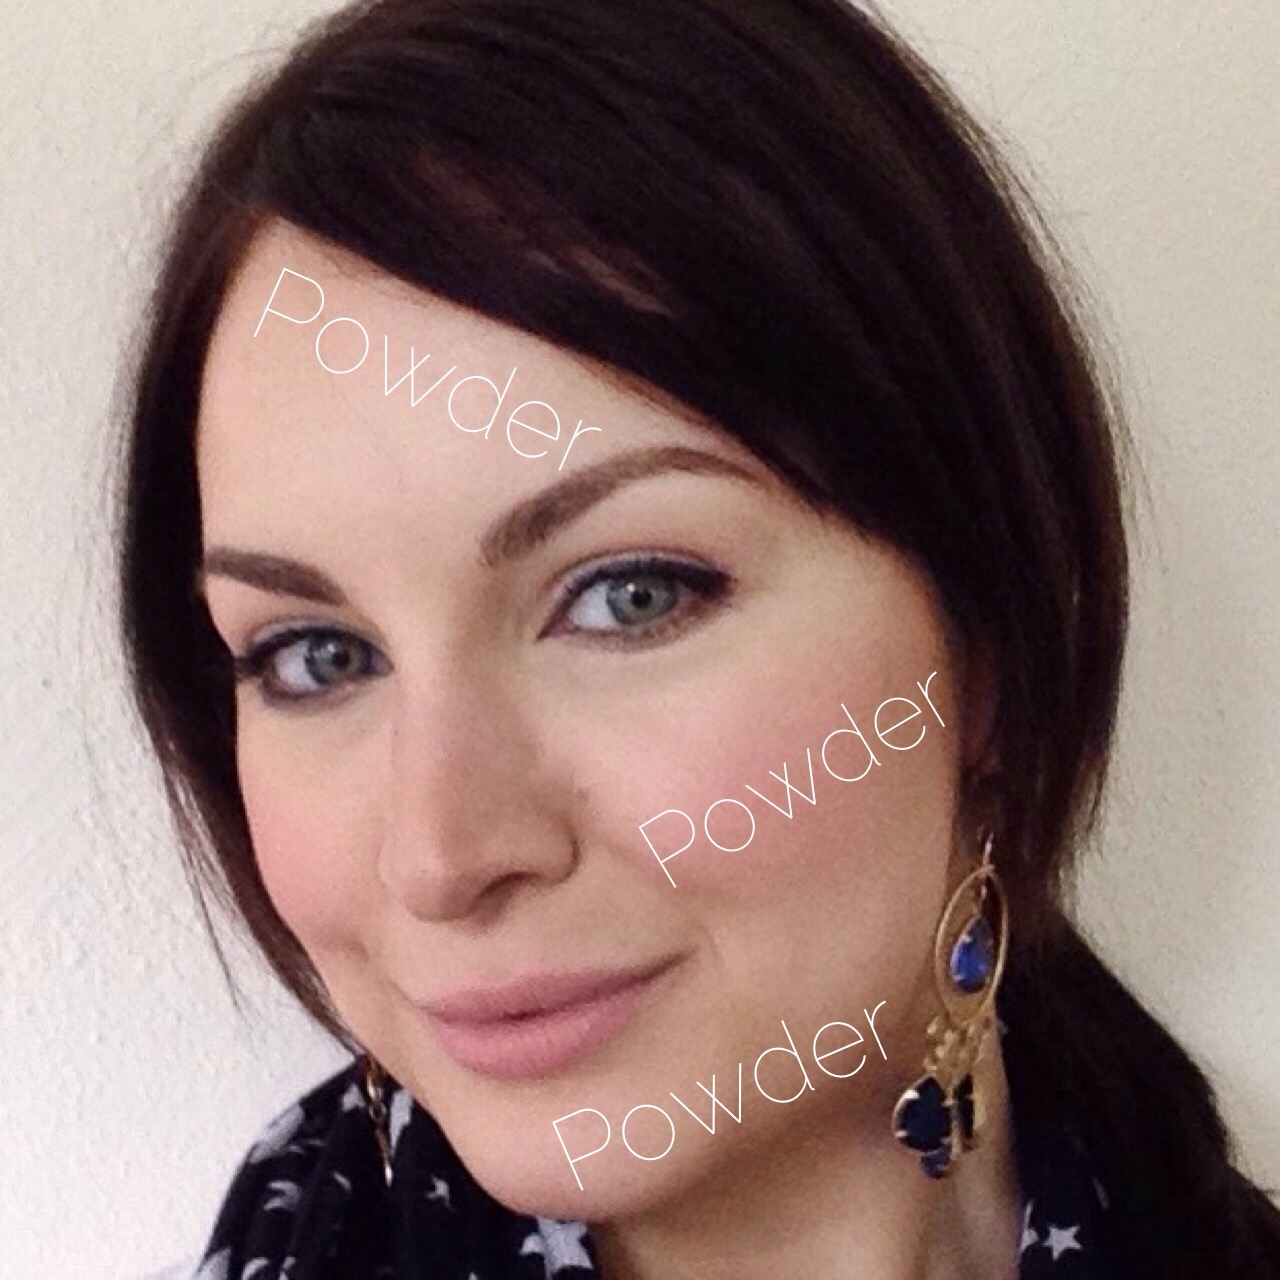
I didn't film this, but I prepped my skin with Murad Invisiblur primer, then applied Bobbi Brown Skin Foundation Stick in Warm Sand 4.5 with my fingers and buffed in Make Up For Ever Pro Finish powder foundation in 140.  I lined my top lash line and bottom water line with MAC eye liner in Smolder and smudged with the e.l.f. Contour eye brush, then topped the liner with Urban Decay Blackout with the same brush, but a clean one.  Next, I blended Brown Script by MAC using the MAC 224 brush into my crease and lower lash line, and feathered the edges with MAC Soft Brown shadow with a clean 224.  I cleaned up the fallout with Almay Makeup Eraser sticks, curled my lashes, and applied one coat of Maybelline Illegal Length mascara in Blackest Black.  Moving on to brows, I used an angle brush to apply MAC eye shadow in Brun, then set with Benefit Speed Brow.  After applying a coat of Maybelline Lash Discovery Water Proof black mascara to the bottom lashes, I concealed with NARS Radiant Creamy Concealer in Custard, using the MAC 130 brush to blend.  I set everything with Urban Decay All Nighter setting spray before applying Kiss Ritzy lashes using the clear Duo Eyelash Glue.  I bronzed my skin with Laguna Bronzer using the Ita brush, both by NARS.  Using a fan brush, I dusted Becca x Jaclyn Hill Shimmering Skin Perfector in Champagne Pop, then lined my lips with MAC Subculture and finished the lip with Armani Beige 100 Rouge d'Armani lipstick.

Screen Siren

IMG_4334.jpg

A couple of weeks ago, we discussed tips for interview makeup, including how your look needs to be a little stronger for interviews via video chat. So what exactly does that mean? Makeup at key points - eyes, cheeks, lips - needs to be brighter and more opaque than what you'd wear on a normal day.  (For reference, instead of taking screen shots, I blasted light on my face to really wash out my skin, similar to what a camera does.) Every Day Makeup: Foundation, Concealer, Bronzer, Mascara, and Lip Gloss

Eyes

If you don't already use an eye liner, help your eyes really show up on screen by adding a thin line to at least the top lash line.  If you're not a fan of liner, a dark, matte shadow applied at the roots of your lashes works just as well.  As a bonus, make sure to fill in your brows to really frame your eyes and create facial structure.

Before/After Eye Liner and Brows

Cheeks

Not a huge fan of blush myself, I have to admit that a little flush of color really does make you look more alive on a shadowy screen.  Keep it matte and bright - think a poppy or peach shade for lighter skin tones and a berry or hot pink for darker tones.  But don't go out and buy a blush.  Remember that too-bright lipstick you can't seem to toss?  Warm a little between your fingers and gently tap on the product for a natural glow, and just make sure it's not too sheer.

Before/After Blush

Lips

Even if you're not a lipstick person, a well-defined lip will go a long way.  Grab a lip pencil (my favorite, and under $5) that matches your natural lip color, trace the rim of your lips, then top with lip balm or lipstick, your choice.  Of course, you can always go for the luscious lip look, too.

Before/After Lips

Friday Flash - Episode 1

IMG_4402.jpg

Welcome to our first Friday Flash!  This will be a little something fun, very unstructured, and a way to usher in the weekend.  Also, we had two very special guests join us, Clark and Kent Beagle - if you'd like to follow their (mostly lazy) antics, please check them out on Instagram: @thesuperbeagles. Here's the Friday Flash, and the products I used are listed below:

Happy weekend!

Face (not filmed):

Murad Invisblur SPF 30 primer

Armani Luminous Silk Foundation in 6.5

Eyes:

Base - Urban Decay Foxy

Outside corner/bottom lash line - Brown Script, crease - Soft Brown, lid - Amber Lights, corners - Corduroy, all MAC

Liner - top, Smolder, bottom, Coffee, both MAC

Mascaras - Illegal Length and Falsies, both in Blackest Black and by Maybelline

Brows:

Urban Decay Faint eye shadow, MAC clear brow gel

Concealer:

Kevyn Aucoin Sensual Skin Enhancer in 07 and Make Up For Ever Lift Concealer in 3

Bronzer:

Bobbi Brown in Medium

Blush:

NARS Orgasm

Highlight:

Jaclyn Hill x Becca Champagne Pop

Nose Contour:

Urban Decay Faint eye shadow

Lips:

Hourglass nude lip pencils in 3, MAC Subculture liner, Charlotte Tilbury gloss in Blondie

Set:

Spray - Urban Decay All Nighter, Powder - Laura Mercier Brightening


Layer Cake

IMG_4335.jpg

I love cake. Specifically, chocolate cake with a whipped mocha or ganache filling and chocolate butter cream frosting. But that's the only way I like it. Unfortunately, I see a lot of caked makeup on faces, and that's not good. While many layers can be buffed together to perfection and look flawless in photos, I believe that light, lasting, photogenic makeup that looks good IRL does exist.

There's a simple answer. Instead of layering foundation, contour, highlight, and so on, on the entire face, just put what you need where you need it.

The trick is to apply powder or cream/liquid products where you get shiny or dry, as needed.

For example, I have dry skin, but as the day wears on some areas get see-through.  My solution is to layer a moisturizing primer under a moisturizing foundation everywhere but under my eyes.  Next, I apply a moisturizing concealer under my eyes, then contour/bronze with powder and add a little brightening powder to the center of my forehead and around my nose. (You can also do this with skincare!)

IMG_4341IMG_4339

Another tip is that oily skin likes powder and dry likes cream and liquid products, but the one time this doesn't work as well is when the entire face is very oily; in that case, powder can mix with oil and get goopy.  The solution for that is to use as little product as possible and stick to oil-absorbing and liquid-to-powder products.

After you get the "skin" aspect of your makeup down, that's when you can start to accessorize, if you will, with eye, lip, and cheek color.

IMG_4342

On a personal note, life is a little hectic right now; but I find that sometimes the best therapy is to sit at a makeup table and create.  So, be on the lookout for the Friday Flash, a quick little makeover that I'll post on, big surprise, Fridays.  Let me know in the comments section, Facebook, or Twitter/Instagram (@electralane) if there's anything you'd like to see.


Luscious Lippies

IMG_4110-1.jpg

In the almost decade that I've painted faces, no client has asked me to make his or her lips look smaller; and while I tend to highlight my eyes instead of lips, I know lips are the main facial feature many focus on. Since there are about 72 million or so videos/tutorials on how create a larger lip line, I'm specifically showing how I fake fuller lips that a) look natural and b) work even if you don't have perfect lips.  If you're a visual learner like me, check out this video (yes, I broke down and started a YouTube channel).

1 - Prep Lips

Apply a little lip balm, then blot with a tissue so your lips are hydrated but not slick.  If they're really dry and flaky, mix a couple drops of olive or coconut oil with 1/2 teaspoon of brown sugar, then gently exfoliate your lips with this paste.  Wipe it off using a damp wash cloth, then apply the lip balm and blot.

2 - Apply Concealer

Using a small dot of concealer, apply to lips and the skin around them.

3 - Fill In

Using a flesh-toned lip liner, fill in your lips making sure to draw just outside the natural lip line.  If you have uneven lips like I do, this would be the time to even them out.

4 - Lipstick

Apply a matte lipstick with a brush over the entire area where you applied lip liner.

5 - Contour

To start adding dimension, line your lips just on the created lip line with a pencil that's slightly darker than the lip color.  Blend gently with the lip brush.

6 - Highlight

In just the center of the lips, apply a matte lipstick lighter than your original lip color and tap with your finger to blend.

7 - Brighten

Unless you like the matte look, top your highlight with a small amount of gloss in a similar color.

FullSizeRender